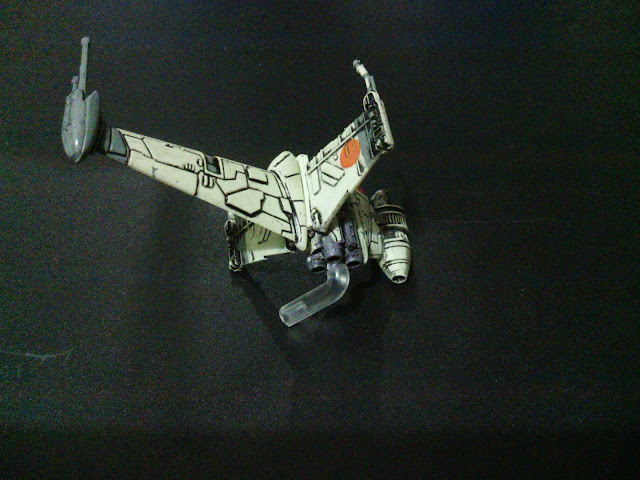
Recently I modified my B-Wing to allow for the depicted rotating cabin, for that first I broke the peg plug on the engines and drilled a hole to fit 1 magnet, decision I regretted almost instantly, as the magnets worked but not all the time so I drilled a side hole to remove the ship side magnet, and after that I drilled a bigger hole one where 4 magnets went in to the hole, 2 were left inside the ship and one was glued to the peg plug so it gives stability to the union, that did the trick to have a stable ship. As for the cabin I forced the window part out and it slides out of a big peg inside (just like the ship stands but bigger), I only sanded the hole on that part to allow it to rotate and removed a portion of the peg to accommodate 1 magnet one on the ship body and other on the cabin, with that the ship rotates as shown on the movie, hope you like it.
Touching up my Crisis
An scratchbuilt Ork looted wagon challenge
first the Images to inspire me

I modeled a door on the rear part and some exhausts
then a cabin
and then went crazy building the treads like 36 ones to be precise
Then I used some plastic studs and glued them against each other to help me create the frame for the tracks.
and currently I have finished to glue the basic shape
it is turning into a great looking tank, I just nee to decide If I need a turret for that S8 weapon or a Transport with a slight better armor.
If it turns ok I might decide to do a tracked Battlewagon or two as those would definitively help my Orks to be really mobile just like I like them.
Doing some work on a XV81 part 3
But first when working with resin you got to be really careful with the dust that can be released, here you will see that even when I just used a hobby knife the dust appears in various pictures. THIS DUST IS DANGEROUS, use a mask to avoid breathing it.
After the last post we should be with something like the following picture that has been around since the first post on the series.


Today we well cover the arms and start by getting a magnet and we make sure there is a big enough hole for the magnet

 when it is big enough I put the magnet with some glue
next there is the turn of the weapons by drilling a magnetically aligned small magnet as you can see here

after that there is jut s matter of finishing the model.

and you have something like that:


I just scrapped a hole where I could mount the mini in a flying base, what do you think?

After completing the model I can say you that the Forge World arms are so much easier to magnetize and swap weapons, I’m still struggling to have strong attachment on the regular models and here is easy cake.
I hope you liked the series and I want to hear from you.
A Little fun with objective markers

I’ve been playing with the hardcover rulebook since it got into my hands. So I found that lovely picture of an objective marker I had to do with a twist, so after doing it I came with the need foe additional markers, now I have one for each army plus an Ork ambush marker.
Magnetizing my Predator Turret
I just started to build my predator and since I have magnetized most of my STC build's I'm posting here how I did it so others my benefit of my little tinkering.
I started by building the turret and cannons.
Next I added 2 medium magnets on the turret front holes as you can see in the next pictures.
Then I clipped the studs and glued some big magnets
After doing so I tested them and worked perfectly, at most I could dremel a better position for the big magnets witch I used because I wanted a really strong adherence in the canon but it is not a must, if you only have medium magnets you can use them, but you must remember that the magnets must be touching each other, so it might be drilling time.
Lastly I didn’t decided that I didn’t want to choose the rear part of the turret so I glued some magnets to the inner part of both choices
Lastly glued the tops and some magnets on the turret interior, here I must warn you that you must be careful with the placement of the magnets or they will snap to only to one side, it is not difficult only a precise operation where you drop some glue in the rear part of the turret interior and then put the already magnetized piece then drop a magnet on the turret interior then put a non magnet separator between the 2 points and drop the other one and voila It will work wonderfully and with out drilling.
One last word of advice: Check All magnets alignments so you have pieces that snap into place and not pieces that fall apart or resist being next to each other.


